I’ve gone over Grab Interactables, but you know what was missing? How to get different inputs! Maybe you want to swap out buttons to grab things instead. If that’s the case, this guide should help you. I’ll also be covering Hand Animations! This works well with covering the Input system since we’ll need the values from the Input system in order to make the Hand Animations work.
To follow along in Unity, just download this Github project and go to the correct corresponding scene.
1 : Unity's Action Input System
Unity introduced the Action Input System in 2018 and it has become the standard Input System when developing for VR. It is event based so it only fires off when the button mapped to the event is pressed and action based, which allows for a variety of input devices/keys to be mapped to a single action. This means we don’t have to stress about writing code for every single controller out in the VR market.
So let’s get a big overview of the Input System by implementing a simple example.
Let’s say we wanted to create movement for a 2D game using the Action Input System.
While on the Assets folder, press right click -> create -> Input Actions
Name it PracticeControls and double click it. It will bring up a window called an Action Map.
Tip – in the top right, click on Auto-Save. This isn’t 100% necessary, but I’ve lost a lot of work not doing this in the past.
Now with this open, we can start mapping out our movement.
First lets add a Action Map. Click on the plus sign and name it Default. Action maps will be the grouping of actions that we will use to handle Player Input.
Second, add an action by clicking the plus sign in the middle. Name this action Move. If you click on the action, you’ll notice that it will have Action Properties depending on what we want the Action to do.
For this example, we’re going to focus on Button and Value. Button will simply determine if a button is pressed or not. Value will return a value depending on what control type we give it. For now, select Value and for Control Type, select Vector 2.
Now under Move, delete the <No Binding>. Click the plus arrow on Move and choose “add a Up/Down/Left/Right Composite”.
Click “UP” and then click “Path” on the right hand side. Type “W” in the search bar and select W [keyboard] . Repeat this for Down, Left and Right using S, A, D characters.
Click the plus associated with move again and select “add a Up/Down/Left/Right Composite” again. Repeat the steps from before and use the arrow keys as inputs instead.
Just like that, we have multiple mappings for the same Action for our game. Whenever one of those buttons is pressed, it will send back values that we can use in our code for movement.
We could continue to dive deeper into this system, but I think we have a good understanding of how it works.
Now how do we tie this into VR?
2 : XRI Default Input Actions
Mapping out ever input button from our VR devices would be pretty tedious. Luckily, we already have the XRI Default Input Actions. To find this navigate to Samples->XR Interaction Toolkit -> 2.0.0-pre.6 – > Default Input Actions.
If we double click it, it will open up the Action Map where we see a bunch of mappings have already been provided. Clicking on the XRI LeftHand we can see all the Actions and Bindings associated with them. Two important ones are typically Select and Activate. If you ever wanted to switch out these controls with a different button, you’d use the Path from before and navigate to XR Controller -> XR Controller (Left Hand) -> Optional Controls and swap it out with whatever button you wanted.
In order to better visualize what all these different Actions do, we can see their values by going to Window -> Analysis -> XR Interaction Debugger. Now when you press Play, you’ll see all the different values from the input mappings.
Look at all those values! Now we just need to figure out a way to use them.
3 : Getting Input Values with Scripts
I want to mention a quick aside. In order to use the Action Input System, we do need something in the Scene with a Input Action Manager Script attached to it. We’ve already done this in the first tutorial when setting up, but if you hopped into this tutorial without doing previous ones, it’s good to know.
Start off by making a new Object in the Scene called InputReader. Add a new Script also called InputReader.
Opening up the Script we want to add the following code.
using System.Collections; using System.Collections.Generic; using UnityEngine; //This will allow us to get InputDevice using UnityEngine.XR;
public class InputReader : MonoBehaviour { //Creating a List of Input Devices to store our Input Devices in List<InputDevice> inputDevices = new List<InputDevice>(); // Start is called before the first frame update void Start() { //We will try to Initialize the InputReader here, but all components may not be loaded InitializeInputReader(); }
//This will try to initialize the InputReader by getting all the devices and printing them to the debugger. void InitializeInputReader() {
// Update is called once per frame void Update() { //We should have a total of 3 Input Devices. If it’s less, then we try to initialize them again. if(inputDevices.Count < 2) { InitializeInputReader(); } } }
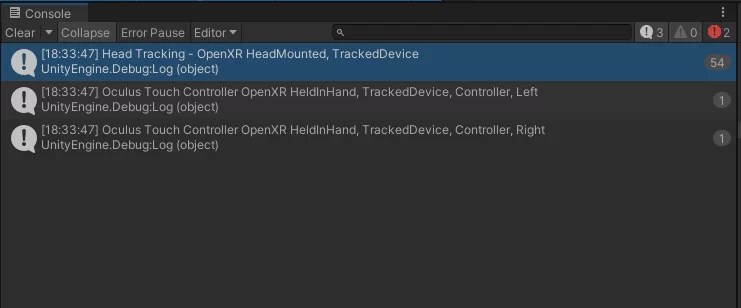
Save and now when you press play, it will display the devices and some of their characteristics.
There it is! We’re able to get a list of our Input Devices and list them out. We now have access to all input devices making it possible to get input values from them.
We’ll dive into using the values in a moment, but now it’s time to hop into animating our hands!
4 : Creating Hand Animations
Start off by navigating to the hand prefabs found in Oculus Hands -> Prefabs. Once there, double click Right Hand to open it up the prefab. In order to make animations work, we need both an Animator and Animation clips. I’ve already attached Animators to our prefabs so we can just focus on creating Animation Clips
To make Animation Clips, we need to open up the Animation Window by going to Window->Animation->Animation (Shortcut: Ctrl + 6). Once open, it should look something like this.
To begin making an Animation Clip for our Right Hand, select the Right Hand in the Hierarchy, then click the Create button in the middle of the Animation Window. Name it RightHand_Default. This is going to serve as our default open hand position.
To save the current position it’s already in, we need to choose a frame ahead and move the rotation of every single object in our hand. Hit the Record Button and move the frame forward by clicking on the timeline in the animation window. Now go through every object in the Hierarchy and rotate them a little. You should have something that looks like this.
Now select all the Properties of the later frame and delete them.
Now that we have our default hand position, we need to create two more. Start creating a new clip by selecting the dropdown in the top left of the Animation Window that says RightHand_Default and choosing Create New Clip. Name it RightHand_Fist.
Click the Record Button (Red dot above dropdown menu). In the Hierarchy, select hands:b_r_index1 and begin to rotate it. You’ll notice that the rotation will be recorded in the Animation Window.
From here, you’ll need to rotate every joint until it makes a fist. This can take some time with trial and error. Don’t get frustrated and eventually you’ll get something like this.
When finished, make another new Animation Clip and name it RightHand_Pinch. For this animation, we’re going to create a pinching hand for when the Player only uses the trigger button. We want our three lower fingers curled in with our index and thumb coming together. We can save some time by navigating to our RightHand_Fist Animation and copying the Rotations from the pinky, ring and middle fingers. Once we’ve copied those over, click the Record Button and rotate our Thumb and Index into the correct position to look something like this.
Now with all the Animation clips set, we need to make an Animation Controller by Right Clicking -> Create -> Animation Controller and name it RightHand Controller. Double click it to open it up.
We’ll be greeted with the Animator Window. Right click inside it and choose Create State -> From New Blend Tree.
Double Click the Blend Tree that was created and this should open up.
In the top left, click on Parameters and click the plus sign to add a new float naming it Grip. Add another float and name it Trigger.
With the Blend Tree still selected, look for the drop down menu in the inspector that says 1D and choose 2D Freeform Cartesian instead.
Still in the Inspector, for the first Parameter choose Grip and for the second choose Trigger.
Under Parameters, click the plus sign and choose Add Motion Field. Do this until you have 4 of them. Give them the following attributes in this order. (0,0) , (0,1), (1, 0), (1, 1). Now your Inspector should look like this.
Next we need to attach animations to the empty Motion slots. 0,0 means nothing is pressed so we’ll put Default there. 0,1 is the trigger pulled so we’ll use the Pinch animation. 1,0 is the grip button so the fist will work. Last is 1,1 which we’ll also use fist for. The end results should be this.
Now we would have to do the same for the Left Hand, but luckily for you I’ve already done it to save time. The last step we need to do is make sure the Animation Controller is connected to the Animator on the Right Hand.
With that, we’re ready to connect our animations to our inputs.
5: Connecting Our Animations
To use the input values, we’re going to attach a new Script to our Controllers. Create a Script called Hand. Add both of these Scripts to the RightHand Controller and LeftHand Controller. Open up the Script and copy/paste the following code.
using System.Collections; using System.Collections.Generic; using UnityEngine; using UnityEngine.XR;
public class Hand : MonoBehaviour { //Stores handPrefab to be Instantiated public GameObject handPrefab; //Stores what kind of characteristics we’re looking for with our Input Device when we search for it later public InputDeviceCharacteristics inputDeviceCharacteristics;
//Stores the InputDevice that we’re Targeting once we find it in InitializeHand() private InputDevice _targetDevice; private Animator _handAnimator;
void Start() { InitializeHand(); }
private void InitializeHand() { List<InputDevice> devices = new List<InputDevice>(); //Call InputDevices to see if it can find any devices with the characteristics we’re looking for InputDevices.GetDevicesWithCharacteristics(inputDeviceCharacteristics, devices);
//Our hands might not be active and so they will not be generated from the search. //We check if any devices are found here to avoid errors. if (devices.Count > 0) {
// Update is called once per frame void Update() { //Since our target device might not register at the start of the scene, we continously check until one is found. if(!_targetDevice.isValid) { InitializeHand(); } else { UpdateHand(); } }
private void UpdateHand() { //This will get the value for our trigger from the target device and output a flaot into triggerValue if (_targetDevice.TryGetFeatureValue(CommonUsages.trigger, out float triggerValue)) { _handAnimator.SetFloat(“Trigger”, triggerValue); } else { _handAnimator.SetFloat(“Trigger”, 0); } //This will get the value for our grip from the target device and output a flaot into gripValue if (_targetDevice.TryGetFeatureValue(CommonUsages.grip, out float gripValue)) { _handAnimator.SetFloat(“Grip”, gripValue); } else { _handAnimator.SetFloat(“Grip”, 0); } } }
I have left comments throughout the code explaining what each step does and why we check for various things.
With that in place we should now remove the Model Prefab from both the RightHand Contoller and LeftHand Controller inside the XR Controller Compoent.
Last we need to connect the Hand Prefab for the Left and Right Controller respectively. Last we set the Input Device Characteristics to have Controller for both the Left and Right Controller and Right for the Right Controller and Left for the Left Controller.
WOOOOOHOOOOOOO. It’s all done! That was a lot longer than I intended.
6: Conclusion
Welp that’s it. You’re now able to play with Unity’s Action Input System, get values from controllers, animate hands and use values from the inputs to apply to hand animations!


Your way of describing all in this paragraph is truly fastidious, every one can simply know it, Thanks a lot.