I wrote a blog post about creating custom Unity templates recently and wanted to write one more specifically for VR. I have loved diving into VR, but creating new projects and importing everything over and over again has begun to drive me insane. This tutorial will help you if you’re starting to suffer from the same pain.
Before I start, I wish to let any reader know that this post will be focused around the Oculus 2 since that is the device I primarily develop for. It should still be helpful if you’re using anything like the Valve Index or HTC products, but a few steps will be different for you.
This guide will be in two parts. The first part will go over how I setup a VR project. The second part will cover how to create a custom template from this project. If you already have your own way for setting up VR in Unity, feel free to skip over to part 2 here.
This guide was made using Unity 2020.3 (LTS)
Step 1: Create a new Project
Start up a new 3D project… That’s it. Next step.
Step 2: Import XR Interaction Toolkit
We’ll start by enabling Preview Mode with the Package Manager. To do this, you must click the settings icon in the top right of the Package Manager, then select Enable Preview Packages.
Next we will be adding packages that I use for VR development. (If you have your own workflow of packages that you use, feel free to import them at this step for your custom template)
The list is as follows:
XR Interaction Toolkit
Universal RP
The Universal RP is not 100% necessary, but I enjoy working with it when developing for VR.
Along with these plugins, you will also need to import the Default Input Actions inside the XR Interaction Toolkit. This can be found by clicking on the XR Interaction Toolkit and expanding Samples.
Step 3: Install XR Plug-in Management
Open up Project Settings (Edit > Project Settings), then click on XR Plug-in Management.
Click Install XR Plug-in Management.
Step 4: Choose your Build Target Settings
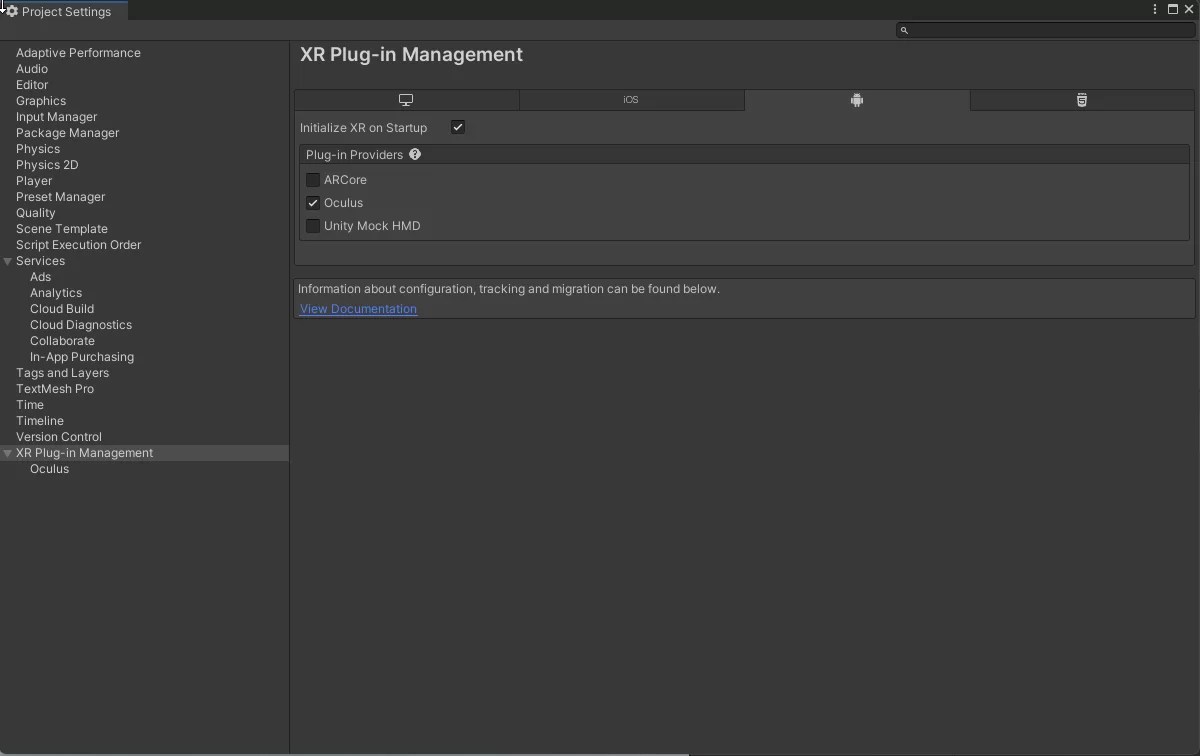
Open up Project Settings (Edit > Project Settings), then click on XR Plug-in Management.
This is where you will be choosing which platforms you’ll be targeting when you go to build your project.
For Oculus Quest and Quest 2 : on the PC tab, select Oculus. Then click the Android tab and select Oculus again.
This picture only shows Oculus selected under the Android tab. Don't forget to select Oculus under the PC tab too.
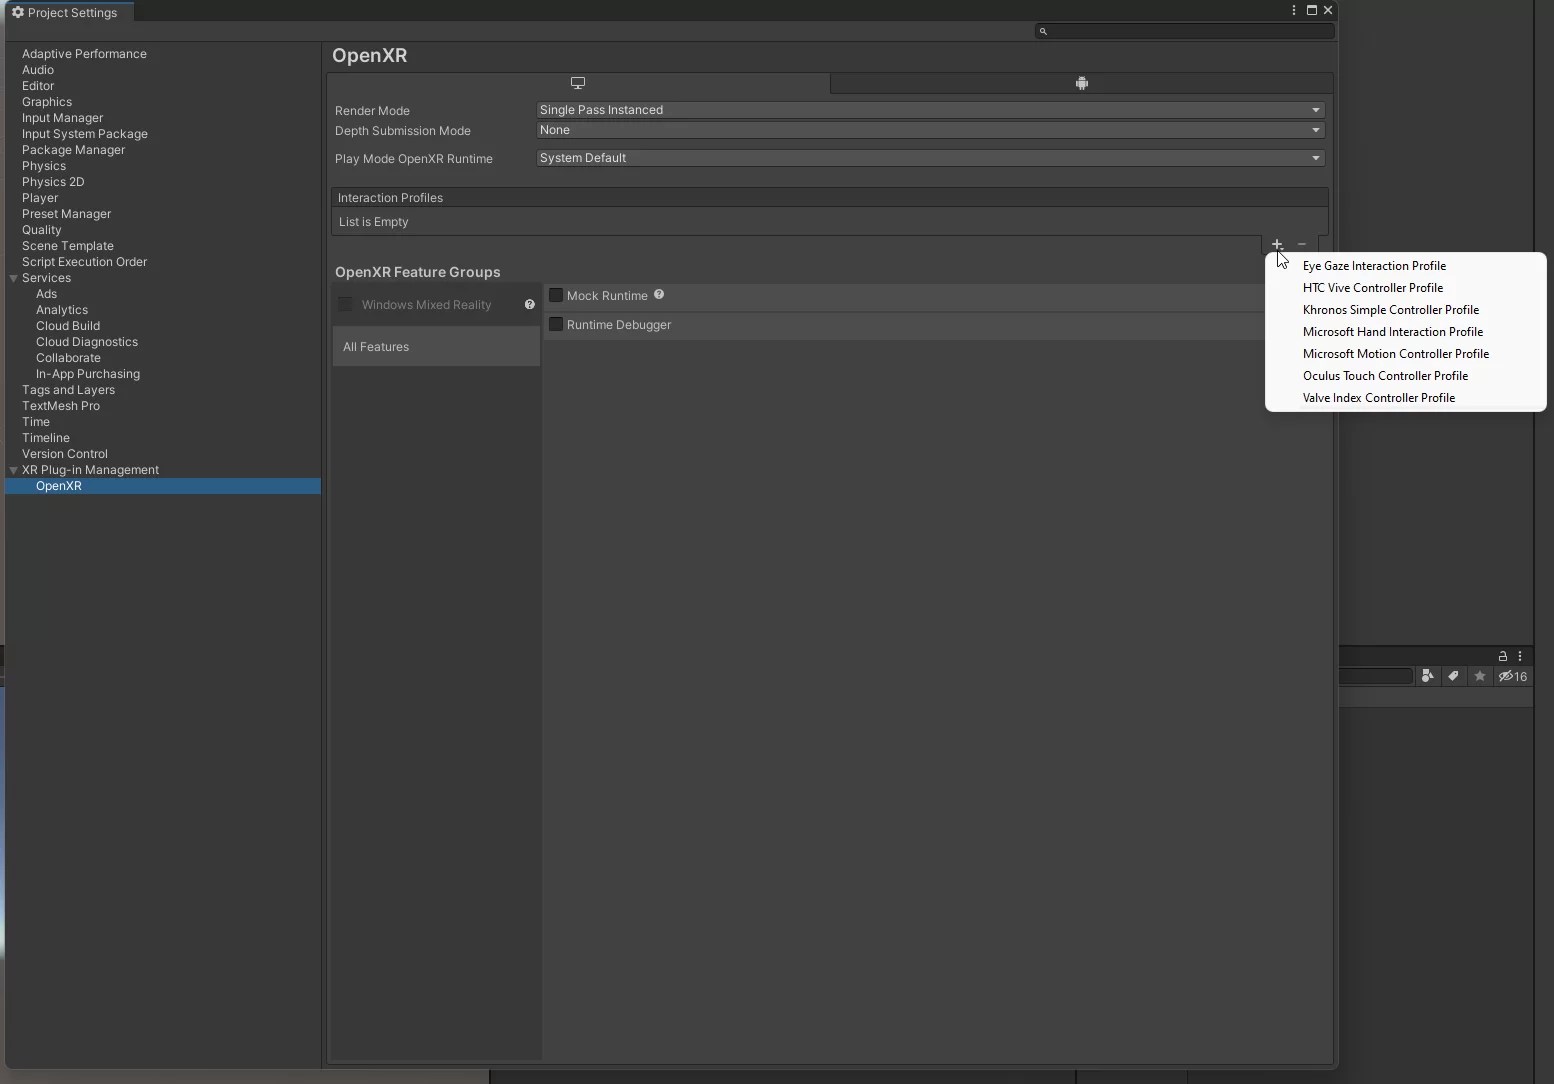
For Valve Index and other Open XR Devices: On the PC tab, select OpenXR. If you receive any warnings, make sure to click the (!) and select FixAll.
Now expand XR Plug-in Management and expand OpenXR, then select Features. You will be given a list of controller profiles to target. Select the ones that you will be building to. (This section may be out of date. Please read the next paragraph if your screen does not resemble the picture below.)
UPDATE: This page may look a little different, but you just need to add the profile for the controllers using the plus sign instead of a check mark. (Example: Add HTC Vive, Oculus Touch and Valve Index profiles if you wanted to develop for those devices.)
Step 5: Add Default Left and Right Controller Inputs
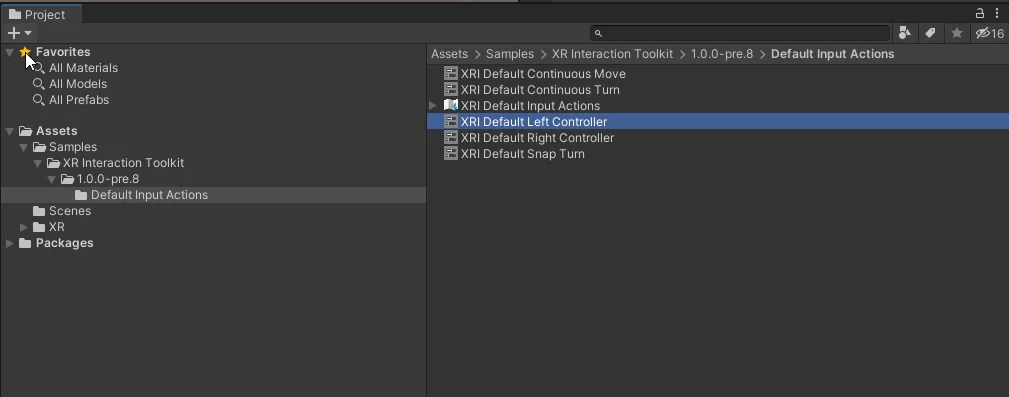
This is where we will use the Default Input Actions sample from the XR Interaction Toolkit.
First we need to locate the Default Input Actions folder within our Assets (Assets > Samples > XR Interaction Toolkit > 1.0.0-pre.8 *this may change with future versions* > Default Input Actions). Then click on XRI Default Left Controller.
In the Inspector, click on “Add to ActionBasedController default”.
Open Project Settings (Edit > Project Settings). Click on Preset Manager. Under filter, we will add the words “right” and “left” corresponding with the correct XRI Default Controller.
Repeat the above steps for XRI Default Right Controller.
Step 6: Move on to Custom Template Creation or Do Optional Steps
Your project should be ready for VR now. I will add two optional steps in this post. One for setting up a test VR scene and one for optimizing the project for Oculus Quest development.
In this step we will be adding in a test scene to make sure everything is working correctly.
Start by adding a plane to the scene. This can be done by right clicking in the scene or the scene hierarchy then going to 3D Object > Plane. Make sure to set the transform position to (0,0,0).
Next we’ll add a XRRigActionBased. Right click in the scene hierarchy and go to XR > XR Rig (Action-based). This will also automatically add a XR Interaction Manager.
After the XR Rig is added, we’ll need a InputActionManager to handle our input from our XR Rig. Create an empty object and rename it InputActionManager. Click on the newly created InputActionManager and click “Add Component” in the Inspector. Add the script Input Action Manager. Once the script is added, add the XRI Default Actions to the Action Assets.
You should now be able to add the test scene in your build settings and try out your test scene with Build and Run.
Step 8 (Optional): Oculus Specific Settings
Oculus has more specific settings that are recommended from Oculus itself. They can be found on the Oculus website here, but I will also cover them in this step.
Go to Build Settings (File > Build Settings) and switch to Android as the target platform. Then select ASTC as your Texture Compression.
Next go to Player Settings (Edit > Project Settings > Player).
Set the Minimum API Level to Android 6.0 Marshmallow
Target API Level set to Automatic
Install Location set to Automatic
Color Space set to Linear
Graphics APIs set to OpenGLES3
Now we’re going to work on the Quality Settings. Click on Quality within Project Settings.
Pixel Light Count set to 1
Texture Quality select Full Res
Anisotropic Textures select Per Texture
Anti Aliasion select 4x
Soft Particles box is checked
Realtime Reflections Probes set to update during gameplay