When optimizing for VR, the main focus should be to maintain a high and consistent frame per second. There are many different things to talk about when it comes to optimizing, so I’m just going to pick one at random…. Let’s talk about polycount and how it can effect our projects!
What is Polycount?
3D objects are made up of what is called a Mesh. The mesh is comprised of a collection of vertices, edges and faces, which are called Polygons. These polygons are how we determine the polycount. I higher polycount can give great definition, but ultimately can cause a lot of strain on resources. As we can imagine, having more objects with a high amount of polygons will cause a tremendous amount of work for when our game makes a draw call to render the graphics every frame.
What's a Good Range for Polycount?
It’s best to target the lowest device that we wish to deploy to. The Meta Quest 2 is a solid choice for targeting optimization since it both has a high number of users and is the most demanding in terms of optimization. If we create a game that can play easily on this device, it should be easy to deploy our game to other devices.
So what is a good polycount for the Meta Quest 2? Luckily, Meta has answered that for us here.
For the Quest 2 it states that roughly 750k – 1.0m is a good range for Triangle Count (AKA Polycount).
Now that we know our range, let’s figure out how to display that in Unity.
Displaying Polycount
One tool we can use to visualize the polycount can be found in the editor. By changing the draw mode from shaded to wireframe, we can see what polygons make up our objects. We can also select individual objects that have meshes, find their mesh filter component and see what the number of triangles make up an object.
In the above image, we can see that the left hand mesh is made from 1678 triangles. It’s easy to imagine that the number of triangles greatly increases as we add only a few objects.
We can also see the polycount as a scene is playing. If we press play and select the stats option within the game window, we will see a number of statistics displayed. One of these stats is Tris, which is short for triangles. Now we can move the camera around in the scene to show how the triangle count will go up and down depending on if we’re looking at a lot of objects or not.
Frustum Culling
The most obvious thing we can do to lower polycount is reduce the amount of objects in our scene. The only problem with that is it makes for a pretty boring game to not have anything in it. We should always keep in mind that removing things if we’ve overloaded a scene is better than suffering bad framerates in VR.
We also have something called Frustum Culling. This actually happens behind the scenes in the Unity engine, but it’s helpful to keep this in mind when thinking of optimization. Frustum culling will only render objects that are within the field of view of the main camera. The view of the main camera is called the frustum, hence, frustum culling!
Occlusion Culling
We can take this idea of Frustum Culling and push it even further with what is called Occlusion Culling. This is similar to Frustum Culling in the sense that it will leave out rendering any object it does not see. The difference is that it takes into consideration walls that would block the view of the frustum.
Above is a before and after of what Occlusion Culling can do.
This is achieved by the Unity Editor generating data about what the camera will be able to see and not see. This is ideal for Scenes that have long hallways or rooms that are clearly separated.
Select the Main Camera
Under the Camera component, Occlusion Culling = true
Window -> Rendering -> Occlusion Culling
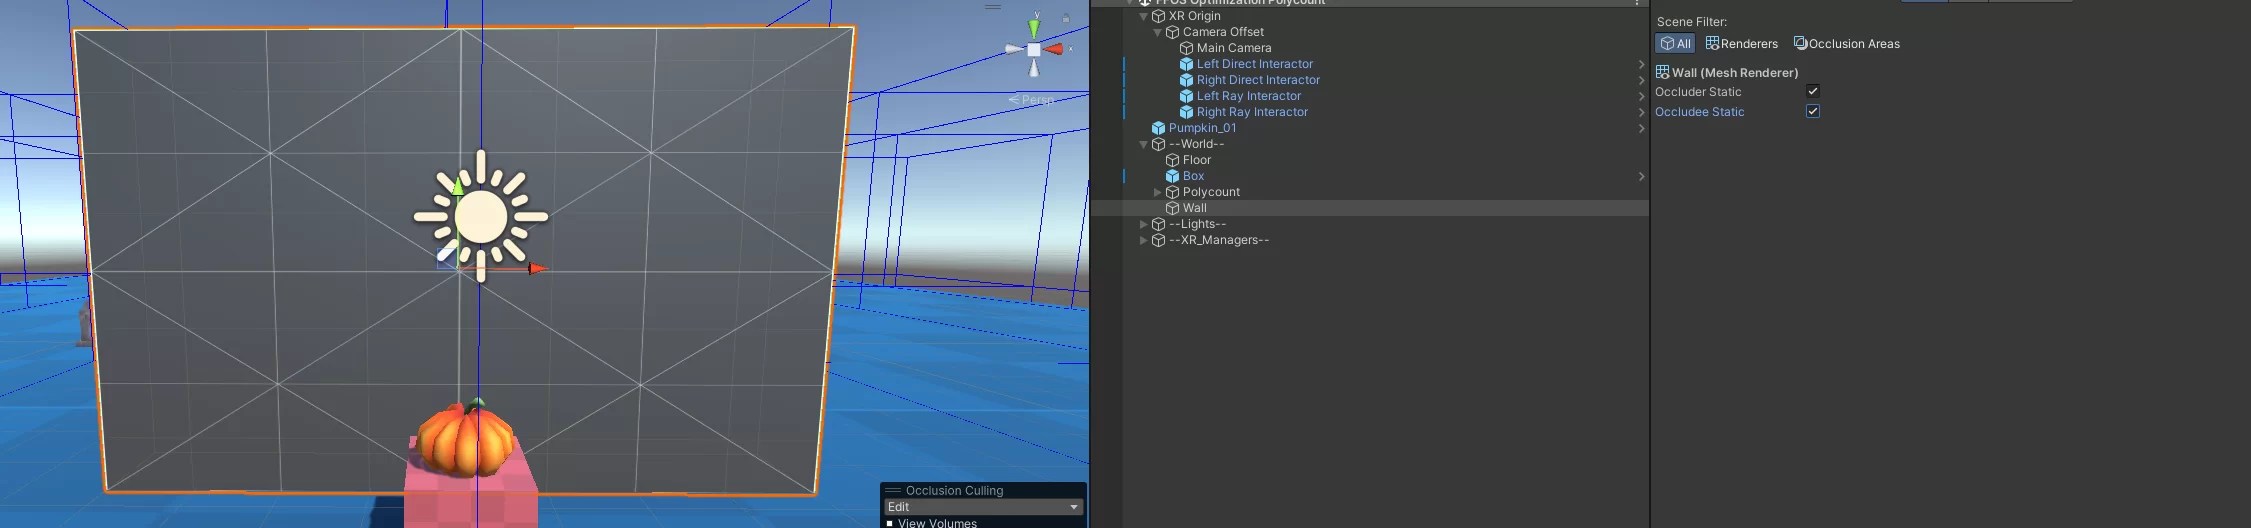
Select an object in your scene like a wall and floor
Select the Occlusion window
Under the Object tab
Occluder Static = true;
Occludee Static = true;
Occluder Static – This should be set for any object that will not move and be occluding other objects. Walls and large stationary objects are perfect examples for Occluder Static objects.
Occludee Static – These are objects remain in place that will be considered for occluding by the occluder static objects. Good examples of why you might want to have an object be a occludee without also being an occluder would be a tree or a fence. Since we would want to see through the fence, making it an occludee would help give us the boost of occlussion culling while avoiding unwanted behavior of hiding objects behind a see through fence.
Now that we have a wall and floor set up to do occlusion culling, lets bake the scene so it works!
Select the Occlusion window
Select the Bake tab
Smallest Occluder = 2
Smallest hole = 0.25
Backface Threshoold = 100
Click “Bake” at the bottom right
With that, our Occlusion Culling is now baked in. We can select the Visualization tab to see what this culling looks like in scene.
The left shows no Occlusion Culling vs having Occlusion Culling. It’s easy to see how this can greatly improve our performance by reducing the number of polygons present when objects are blocking other objects.
Occlusion Culling has much more to offer, but in this tutorial, I just wanted to cover the basics since even the basics can provide great performance improvements.
Conclusion
When considering how to improve performance, it helps to always keep in mind the polycount every scene. Populating a scene with gorgeous objects and meshes is important, but doing at the expense of frame rates is not the way to produce a fun user experience.
With a few magic tricks like Frustum Culling and Occlusion Culling, we can reduce the amount of polygons while still providing an amazing experience for our users!